
Uncommon Knowledge Podcast
I sat down with Dr. Alice Elizabeth Wilson to talk about my path to leading Brand and Content at Arrived—a platform that’s opening up access to real estate investing in a way that’s never been done before. We dug into how my unconventional background influences how I approach content today.
I recently had the chance to sit down with Dr. Alice Elizabeth Wilson on the Uncommon Knowledge podcast to discuss brand storytelling, content strategy, and how my unconventional career path, which began with movies and memes, ultimately led me to the world of fractional real estate investing.
We covered a lot in under 30 minutes—from why I believe fintech content doesn’t need to be boring, to how we’re building trust with first-time investors at Arrived, to the wild ride of launching The Byers House.
🎧 Watch the full episode below and let me know what resonates with you.

5 Mac Productivity Apps I Use to Get Sh*t Done

My name is Bret and I’m hopelessly addicted to productivity apps. While most people are off doing normal people things, I’m over here daydreaming about keyboard macros or trying to figure out if I can justify spending $15 a month on a Roam Research subscription. I just can’t get enough of this stuff.
So when it comes to managing projects and keeping myself organized, I spend a considerable amount of time looking for new ways to streamline my workflow and improve productivity. I fully realize that with the amount of effort I spend researching productivity hacks, testing new applications, or watching YouTube videos at 2x speed on how to get things done, it's likely a net negative in terms of actually getting things done.
But hey, for all the time I spend doggedly looking for the next big thing, I occasionally come across something I just can't imagine living without. For this list, I've attempted to narrow it down to the top five applications I find most useful and how I’ve incorporated them into my day-to-day workflow.

1) Alfred
Price: FREE with optional Powerpack license for £29
Alfred is an application launcher I've used for years. Even as Spotlight in MacOS has improved and adopted features that were clearly inspired by the app, Alfred is still leaps and bounds more useful.
The basic application is free, and allows you to launch applications, find and open files, search the web, or even toggle system commands via keyboard shortcuts. But where I think Alfred really shines is with the optional Powerpack license that unlocks a ton of additional functionality.
Some of the Powerpack functions I use regularly include:
The ability to access a list of items you have previously copied to your clipboard. You can even type to search through the entries or merge multiple entries together.
Text snippets you can save and then trigger with a defined keyword (a great alternative to something like Keyboard Maestro or TextExpander). If I type anything more than once, I will usually save it as a snippet for future reference.
Additional ways to navigate your file system and perform actions like emailing, moving, copying, or even resizing and reformatting files without having to open them and process them manually.
Another really useful function the Alfred Powerpack offers is the ability to launch custom workflows that you can create yourself or install from hundreds of user-created options.
Some of the tasks I have simplified using Alfred workflows include:
Price: $8.50 for a 2-year license, $20.50 for a lifetime license
BetterTouchTool is an application that has fundamentally changed how I interact with my computer. From providing additional multi-touch gesture controls for the trackpad and Magic Mouse, launching scripts and Automator workflows via keyboard shortcuts, to resizing and snapping windows to different screen quadrants, this application is a game changer for every input device you can think of.
One of the main things you can do with BetterTouchTool is create custom trackpad gestures, either globally, or on a per-app basis. For example, when working in Chrome I can refresh the page, close/re-open individual tabs and navigate forward and backwards between them, scroll to the home or end of a page, close windows, and switch between pages or other programs through a series of swipes, taps, clicks, and tip-taps on my trackpad without ever having to use a keyboard shortcut.
You can download a copy of my current BTT profile if you'd like to see how I have mine set up or if you want to use it as a jumping off point.
If you have a MacBook with the Touch Bar, check out GoldenChaos-BTT, a complete Touch Bar UI replacement you can install through BetterTouchTool that adds a ton of functionality such as modal widgets, a battery percentage icon, and so much more. It will change the way you feel about the Touch Bar, guaranteed.
3) Drafts
Price: FREE with limited features, $19.99/year for Drafts Pro
Drafts is a relatively new addition to my workflow, but has become an integral part of how I input and process text. This app is designed to open directly to a blank page so you can immediately start typing without first having to make a decision on where your text will ultimately end up. The drafts you create are mirrored on all of your devices and saved to an inbox to process later, send off to other apps and services via actions you create, or tag and archive for long-term storage.
When I start up my computer, I launch Drafts and keep an icon in my menu bar for when I need to capture a thought or quickly start a new draft. Once I finish typing something, I have a set of actions I can use to send it to a number of applications and then automatically archive or trash the draft. Drafts also lives in the dock on my iOS devices and is one of the few apps I give permission to show icon badge notifications. This way I know at a glance if there's a to-do list item, message, e-mail, blog post draft, etc. that requires my attention.
You can get most things done on Drafts with the free version, but I chose to upgrade to Drafts Pro to unlock additional features, most important to me being the ability to create my own custom actions.

4) Trello
Price: FREE with limited features, $9.99/month for a business class license to unlock additional features
Update: I have since transitioned from Trello to Todoist, largely due to how the platform handles recurring items and subtasks. I still utilize many of the same methods for creating tasks via Alfred workflows and forwarding emails to capture new items for various projects.
Out of all the project management platforms on the market, Trello strikes the right balance between being feature-rich and not overwhelming. With some of the other applications I've worked with, I feel like I spend more time fussing with the project management tool than actually managing my projects. Trello's Kanban-style flow works well for the way I work, and it's easy to manage projects and tasks across platforms via Mac, iOS, or web app.
If you choose to use the free tier like I do, there are some limitations meant to encourage you to upgrade to one of the paid plans. The free plan only allows you to utilize one "power-up," which limits some of the functions and automation features that might be important to you. However, I've largely been fine with the free version and haven't felt the need to upgrade.
A few of the tips I use to maximize my workflow using Trello:
You can create new Trello cards on your boards by forwarding messages to a unique email address. I use this feature regularly to send emails to my boards so I can capture and process them while still maintaining a tidy inbox.
I use IFTTT to create recurring cards for weekly 1:1s, reminders to update monthly reports, etc. This saves me from having to burn my one power-up on Trello's Card Repeater function.
I use multiple input methods to add cards to my to-do list. Whether I'm using an Alfred workflow/keyboard shortcut to capture a quick note during a meeting, using a Chrome extension to add cards to my boards while browsing the web, or routing something I start typing out in Drafts to Trello, I try to make capturing things as easy as possible.
5) Fantastical
Price: FREE with limited features, $3.33/month for a individual license to unlock additional features
Fantastical is hands-down the best third-party calendaring app on the Mac. While some users have been less than thrilled at its move to a monthly subscription model, the application still offers the best feature set for anyone managing multiple calendars.
Fantastical is a beautifully designed application that integrates with all the necessary services (Google, iCloud, Microsoft Exchange) and gives you multiple ways to visualize your upcoming appointments and reminders. But where the program really excels is in terms of how it processes natural language. For example, to create a new event or reminder entry, you simply need to type something like "Weekly staff meeting every Thursday at 1 pm," and Fantastical will create a new recurring event for "Weekly staff meeting" every Thursday at 1 pm.
I leave Fantastical running in the background and primarily refer to an icon in my menu bar to see what meetings I have coming up throughout the day. I also have a few different filter views of my various work and personal calendars that I switch between depending on the context of what I'm working on at the time. By using a combination of Siri, Drafts, and Alfred workflows, I can easily create new events on the fly as they come up.
So there you have it—the five most important Mac applications I use to get work done. Hopefully, there’s at least one worthwhile takeaway here for you. I'd love to hear what applications or services have been game-changers in your field. Feel free to email me at bret@bretneuman.com with any comments or feedback.

Improve the Quality of Your Video Calls at Any Price Point
Whether you are looking to improve the quality of your audio/video on Zoom, Microsoft Teams, Google Hangouts, Skype or any of the other popular video conferencing platforms, there is a lot you can do at any price point to up your game.

As remote work becomes a staple for the foreseeable future and beyond, many of us are spending more time than ever interacting with our co-workers via virtual meetings. Whether you are looking to improve the quality of your audio/video on Zoom, Microsoft Teams, Google Hangouts, Skype or any of the other popular video conferencing platforms, there is a lot you can do at any price point to up your game and ensure you are putting your best foot forward (virtually).
First Things First, Time to Nail the Basics
Before you even spend a dime, there are a few things you can do to improve the quality of your audio and video feed.
You definitely have a pair of headphones lying around, so use them.
Wear headphones to prevent a potential feedback loop. This can occur when the video conferencing platform’s noise suppression is unable to cancel your microphone's picking up the sound coming from your speakers. Also, using a handset (like the headphones that likely came with your phone) can often give you better audio quality than your computer’s built-in mic due to the close proximity of the inline microphone to the sound source.
Beware of backlighting unless you’re a spooky ghost.
We’ve all been in a meeting with the ominous silhouette of a co-worker who isn’t mindful of the relationship between the poor dynamic range of their webcam and the direct sunlight pouring through their office window behind them. If you don’t want to look like a confidential informant in the witness protection program, go ahead and spin yourself around to harness some of that sweet, soft window light.
Show your good side… no, your other good side.
If you’re sitting at a desk and using your laptop’s built-in webcam, chances are the camera is angled slightly upward and pointed directly up your nostrils. Or if you have a webcam fixed to the top of a large external monitor, the camera is likely pointed down at that patch of thinning hair you’re totally not self-conscious about. Either way, neither of these options presents the most flattering angle. If possible, try to elevate your laptop on a stand (or even a stack of books) and mount your external camera on an adjustable tripod that sits closer to eye level.
For those that work in an indoor pool, concrete bunker, or Hypercube made out of subway tile.
Most of us don’t have the luxury of working in an acoustically treated room, but that doesn’t mean we can’t take steps to reduce reverb and make it easier for our colleagues to hear and understand us. If your space has hard surfaces such as tile floors, bare walls, or a ceiling made of reclaimed aluminum sheeting, try to find a more appropriate room to work in. If that’s not an option, look for ways to absorb some of that sound. This could be as simple as adding a rug or hanging some drapes. Whatever you can do to knock down some of those sound waves will greatly improve the quality of your audio.
Now That We’ve Covered the Basics, Let’s Spend Some Money!
The fact is, you don’t have to spend a ton of money to get great results. The quality of your video call will primarily be affected by three things: your camera, lighting, and audio. And if I had to recommend improving only one of those three things, I would prioritize audio.
Audio is the most important factor that separates a quality video call from a terrible one, and it’s also the thing most people get wrong. The built-in mic on most modern laptops is not that bad regarding audio fidelity, but the biggest reason it’s ill-suited for this application is how far away the mic is from the subject’s mouth. Even a poor-quality microphone can sound pretty good if you can get it 6-12 inches from the audio source, which is why I recommend an external microphone as the first item you purchase to improve your setup.
Audio
The microphones we’ll be looking at fall into two categories: those that connect to your computer directly through a USB cable and those that require an audio interface to convert the analog input to a digital signal your computer can interpret. To keep things simple, let’s just say that those who are looking for a plug-and-play option should stick with USB, and those who might be looking at a more expensive mic that can be used with other audio gear might want to go with an XLR mic + audio interface.
The Budget Setup:

Price: $59.99
At this price, you’re not going to find a more versatile option than the Q2U. This mic features both XLR and USB outputs and even includes near-zero-latency headphone monitoring and an onboard level control.

Price: $13.50
Even though the Samson mic includes a desktop stand, you’ll still want to pair it with a boom arm in order to have the flexibility to adjust the mic closer to the audio source. This one isn’t winning any awards for it’s design or construction, but it’s cheap and will get the job done.
Total cost: $73.49
For a Little More:

Price: $129.99
While I personally prefer the sound of the competing Rode NT USB mic, it’s hard to argue with the feature set of the incredibly popular Blue Yeti. This microphone sounds great at its price point, allows you to choose multiple polar patterns depending on your recording scenario, and also has an on-board gain knob and mute switch.

Price: $99.00
If you’re upgrading your mic, you might as well upgrade your boom arm as well. The Rode PSA1 will give you internal (and much less squeaky) springs, additional mounting options, and a more premium user experience. But all of that comes with a price considerably higher than the standard inexpensive boom arm.
Total cost: $228.99
The Premium Setup:
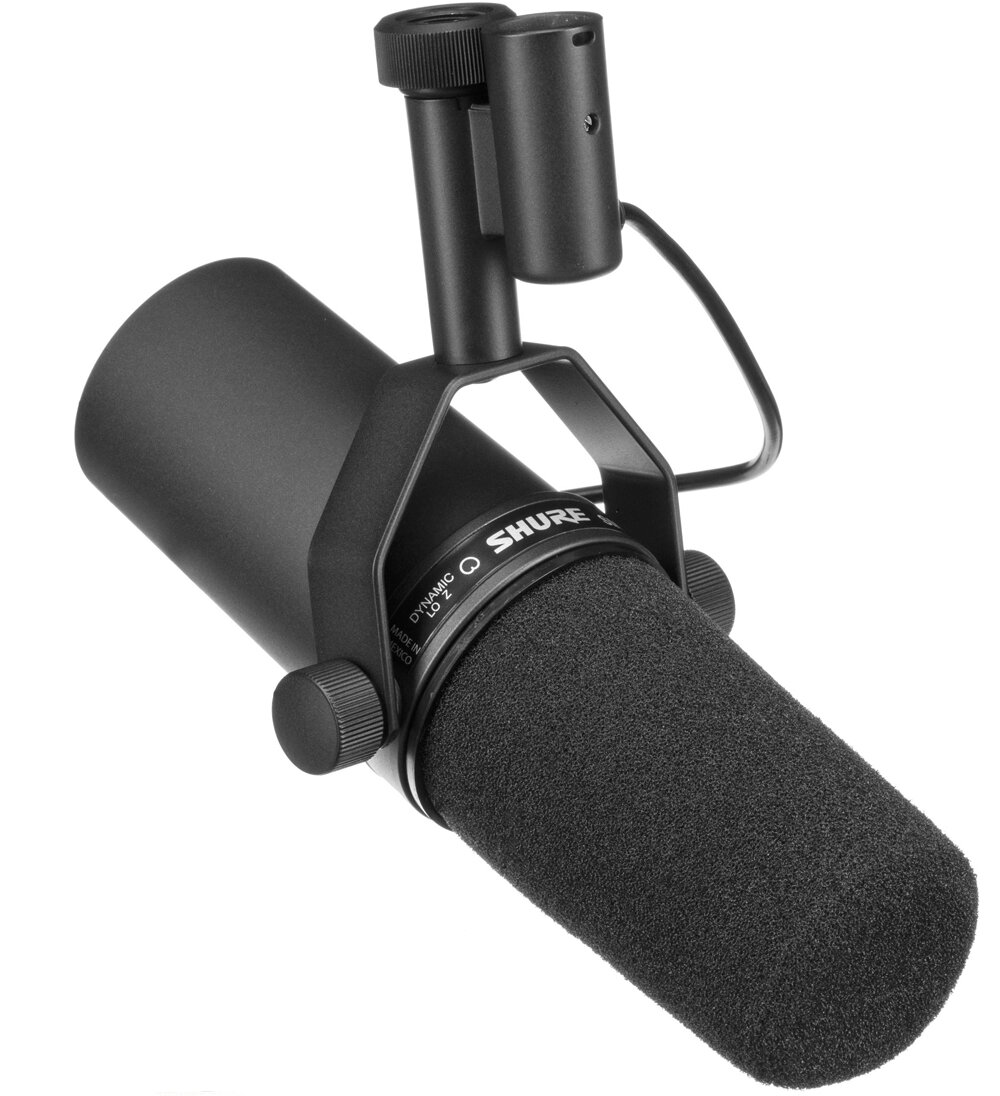
Price: $399.00
A favorite of podcasters, voice-over artists, broadcast personalities and music producers alike, the Shure SM7B is a dynamic mic based on the classic SM7 that has been a staple for recording vocals since the 1970’s. The SM7B especially shines for spoken word and is one of the more beloved microphones for good reason.

Price: $149.00
One thing you need to keep in mind if you’re using the SM7B is that it has a relatively low output and needs a lot of gain compared to other mics. The Cloudlifter takes the phantom power from your interface and converts it to an additional +25db of clean gain. This means you don’t have to crank up the levels on your audio interface which can introduce unwanted noise depending on the quality of the pre-amps in your unit.

Price: $159.99
While the Scarlett 2i2 is certainly not the most expensive or premium audio interface on the market, it provides a good value proposition in terms of features vs. price. And with two XLR-1/4" combo inputs, you have the versatility of running two channels at the same time that will accept a standard XLR mic input or a 1/4” instrument cable.

Price: $109.00
Coming in just a hair more pricey than the Rode PSA1, the Heil is also a premium boom arm that is leaps and bounds better than the other budget run-of-the-mill options. While similar in build quality and function to the PSA1, the Heil offers internal cable routing so you can keep your setup ultra clean.
Total Cost: $866.99
Lighting
After audio, lighting is the next most important component in upgrading the quality of your video calls. Aside from the low resolution, the main reason your video looks terrible is due to how poorly the small sensors in webcams handle low light. You’re much better off with great lighting and a terrible camera than you are with a great camera and terrible lighting. Depending on your environment, you might be blessed with natural window light which is great if you can harness and control it. But for those of us who are stuck hiding from our kids in a dark basement office, we will need to look at other options.
The Budget Option:

Price: $33.99
If you’re just looking to bring up the exposure of your face and you’re not too worried about the softness of the light, this 10” ring light might be a good option for you. The unit is dimmable and can be adjusted from warm light (like what you might get from a lamp) to a cooler temperature (like what you might get from the daylight coming through a window). As a bonus, it also comes with a stand and phone holder that may come in handy for one of our budget camera setups coming up.
Total Cost: $33.99
For a Little More:

Price: $108.00
This cost effective dimmable bi-color light produces relatively soft light with accurate colors (CRI 95+). The light can be powered by a wall plug or with the two included NP-F style batteries, which gives you the flexibility to use the light when there isn’t a power outlet nearby.

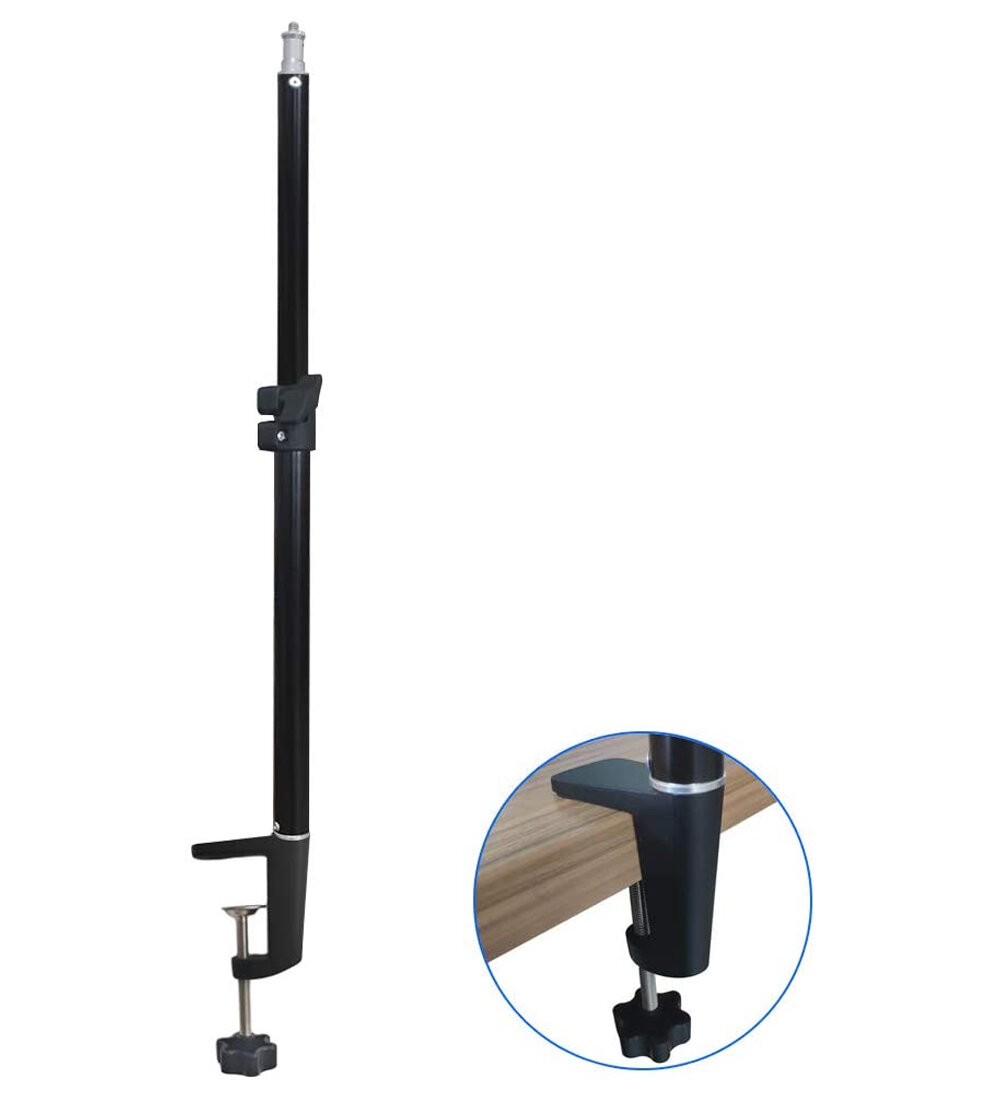
Price: $25.95
The Godox light does not include a stand, so you’ll need something to secure the light. This option mounts directly to your desk and allows you to adjust the height of your light without taking up a ton of room.
Total Cost: $133.95
The Premium Setup:
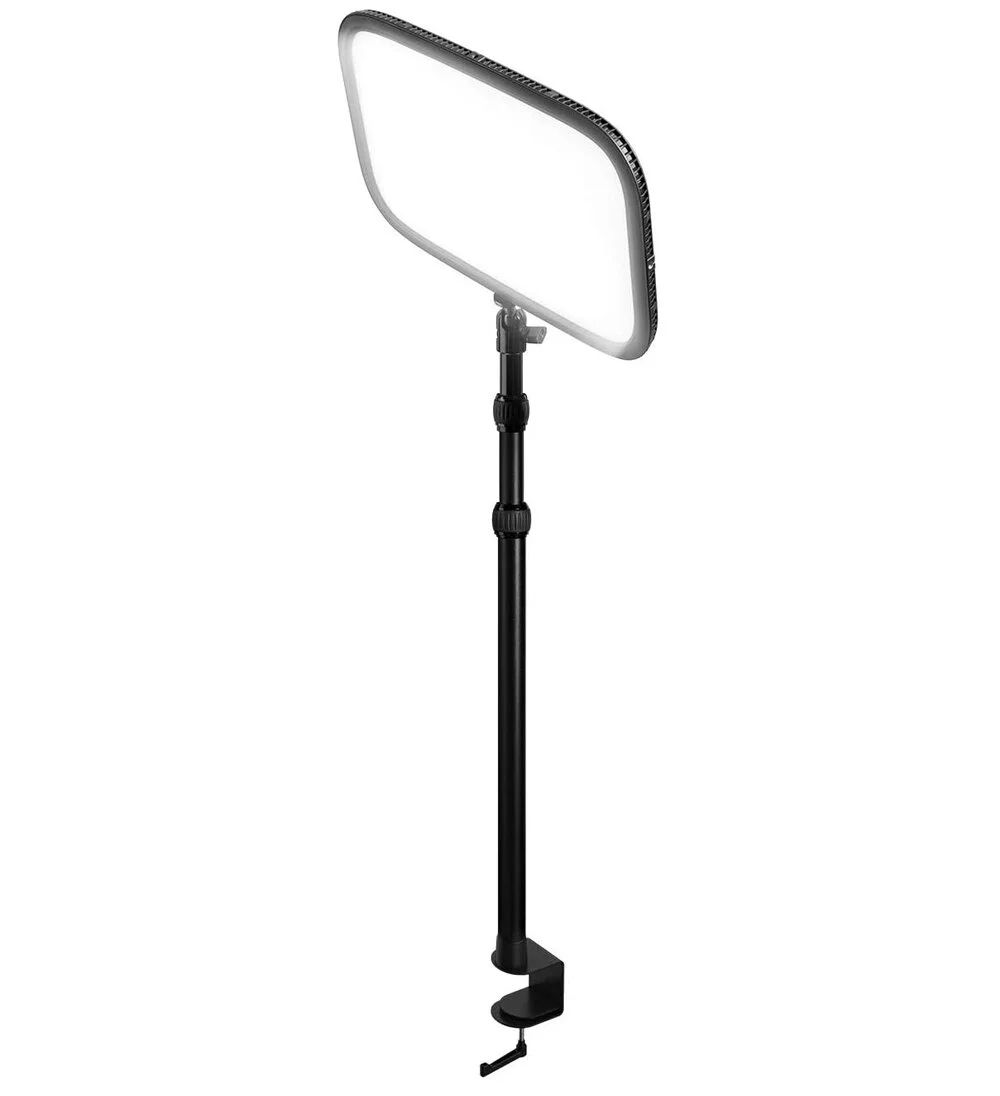
Price: $199.99
The Elgato Key Light is a favorite among streamers and content creators. Like the Godox light, it also offers a high CRI and dimmable soft bi-color light. But where the Key Light surpasses the cheaper Godox light is in its all metal construction, included desk stand, and increased light output.
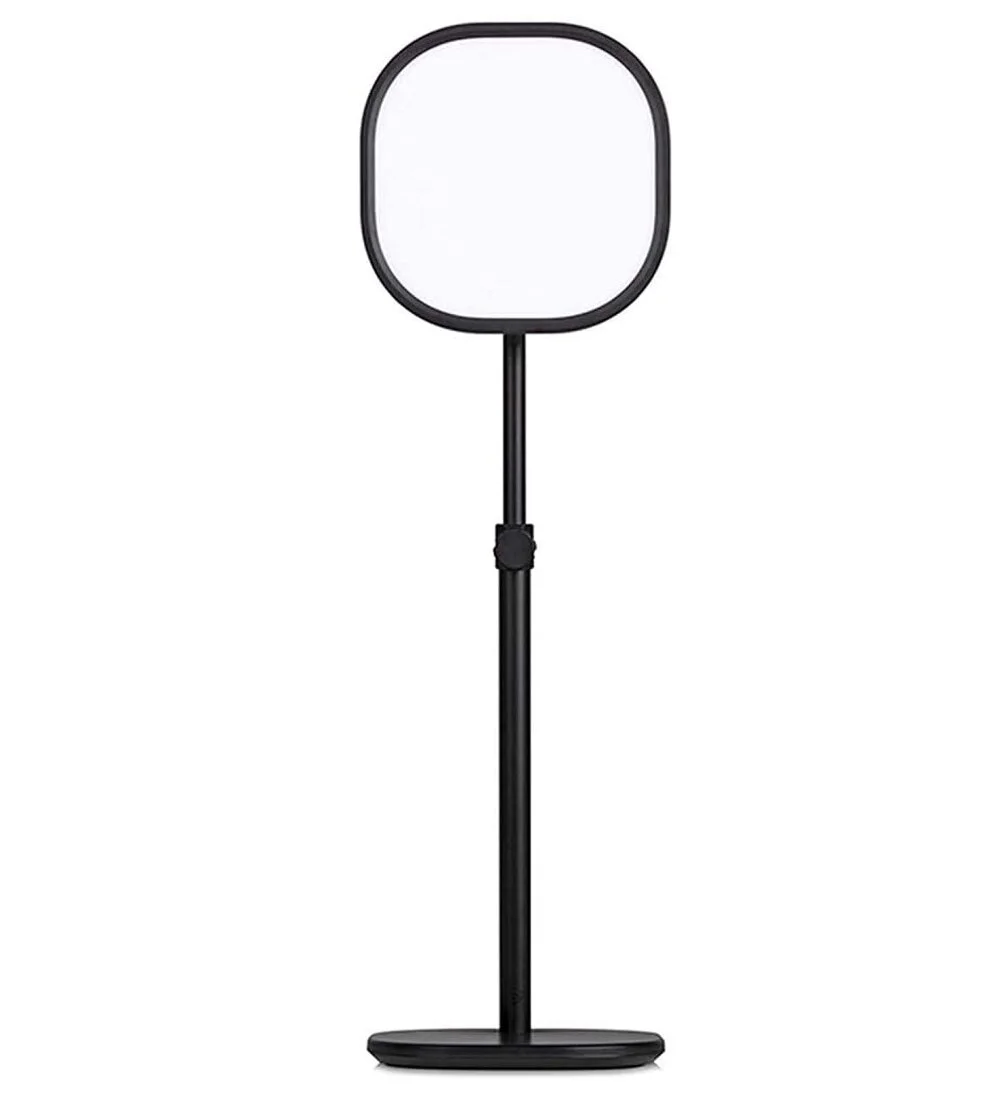
Price: $129.99
If you have the budget, I’d recommend considering a second fill light so you can better control the look of your lighting setup. If you want to save some money, Elgato also offers a slightly cheaper Key Light Air that might fit the bill. The Key Light Air includes a stand that is made to sit directly on your desk, which depending on your setup may be a better option than the Key Light’s desk top clamping system.
Total Cost: $329.98
Bonus Option:

Price: $745.00
If you have the budget and space, it’s hard to beat the look you can achieve with a COB light and large softbox. The smaller LED panel lights can’t compete when it comes to output and the quality of light this setup can produce. But remember that aside from the increased cost, you must also manage a much bulkier setup.

Price: $219.00
At 34.8” in diameter, the Aputure Light Dome will reflect and diffuse the light through multiple layers of material to provide a large soft light source that wraps around the subject. If the larger Light Dome is a little too big for your space, Aputure also offers the Light Dome Mini that comes in at slightly smaller 21.5” in diameter.

Price: $110.36
This Manfrotto stand is sturdy enough to handle the Aputure light but also collapses down to a surprisingly small package for maximum portability.
Total Cost: $1,074.36
Camera
Now that we’ve tackled audio and lighting it’s time to see what we can do to improve on the potato-level quality of your computer’s built-in webcam. For this section I will concentrate on three potential solutions—repurposing a camera you already have, buying an external webcam, or getting the highest quality possible by using a DSLR or mirrorless camera.
The Best Camera for the Job May Already Be in Your Pocket
The quality of cameras on most phones these days is leaps and bounds better than the average webcam. For this option we will look at ways you can use the camera in your iPhone or Android device as a camera your computer can select as a webcam.

Price: $8.99 for EpocCam and $4.99 for DroidCam
These apps let you download a client for your computer that connects to your phone either wirelessly or through USB and turns your phone’s camera into a webcam that can be selected in any of the popular video conferencing programs. Connections can be finnicky at times (especially over wifi) but the quality you get is easily worth the low cost and amount of tinkering it takes to get them up and running.

Price: $39.99/year
Reincubate Camo offers similar functionality as the previously mentioned apps, but offers additional features at a more premium cost. Camo will connect your phone as a webcam but also gives you the ability to manually dial in your settings, whether that be choosing which of your phone’s cameras you’re using or tweaking the settings like white balance, exposure, hue, etc.

Price: $16.79
This mount is super goofy looking but should allow you to clip in your phone and adjust it to the sweet spot for your video call. As a bonus, you could also attach this bad boy to your headboard for some handsfree Netflix binging.
Total Cost: $25.78-$56.78 (with a $39.99 cost billed each year)
Now Let’s See What Else You Have Laying Around the House That Could Work
WIth an HDMI capture card, you can use any camera as a webcam as long as it has a clean HDMI-out (i.e. the ability to display what the camera sees without any menu items superimposed on the screen). A likely candidate for this is that GoPro you had to buy but is now just sitting on a shelf gathering dust. The good news is that you can justify that dubious purchase and use it for something useful by pairing it with an inexpensive HDMI capture card.

Price: $19.99
At a fraction of the cost of the popular Elgato Cam Link, this HDMI to USB capture card offers similar functionality. To use this card, you just need an HDMI cable (or micro/mini to HDMI depending on your camera) and you can connect a camera you already have to use as a webcam.
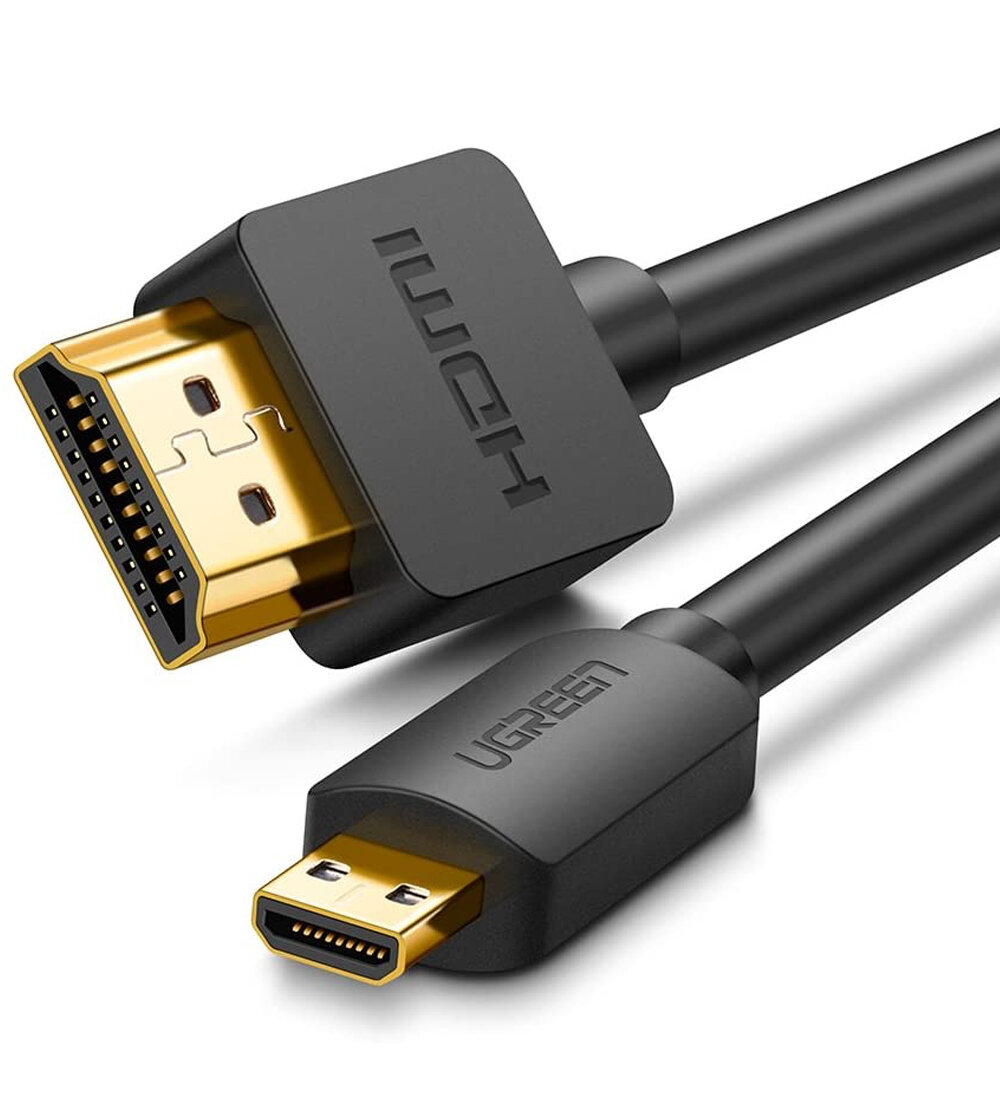
Price: $8.99
In order to connect to your camera, you’ll need an HDMI cable of some type. Make sure to check which connector your camera uses or purchase an HDMI adapter if you already have a spare HDMI to HDMI cable laying around.
Total Cost: $28.98
If You’re Looking for a Traditional External Webcam:

Price: $99.99
The C922 offers a few small upgrades over the previous version C920. If you want to ensure you can stream at 1080p on all platforms or require the ability to do 60FPS at 720p, then go for the C922. If those options are not a requirement, you can save $20 by purchasing the C920. Either way, you can’t go wrong with either.
Total Cost: $99.99
DLSR and Mirrorless Cameras—The Ultimate Zoom Call Flex
If you’re a sucker for that shallow depth of field look and cringe whenever you see the fake software generated blurred background effect that some platforms offer, then it’s time to start looking for a good DSLR or mirrorless camera. The sky is really the limit as far as how much you want to spend, and there are more cost-effective options to be had as well, especially if you’re open to perusing the used market. Some popular options include the Sony a5100 (~$450), Panasonic Lumix G7 (~$600), and the Canon 80D (~$1200).
Some things you’ll want to consider when looking at DSLR or mirrorless cameras for streaming:
Does the camera provide a clean HDMI out?
Many options, especially budget cameras, will not offer a clean HDMI out, which is required if you want to connect your camera via USB or HDMI to a USB capture card. Check Elgato’s helpful Cam Link camera check resource to see what limitations your camera of choice might have.
Does the camera have any recording or monitoring limits?
Many cameras have a limit on how long they can record or display an HDMI signal. Depending on the model, the camera may only stay on for 30 minutes at a time without shutting itself off. In some cases, you can bypass this restriction by providing constant power through a wall plug, but in other cases, you might need to tap the camera shutter button every so often to keep it from going to sleep.
Is battery power sufficient, or should you invest in an AC power supply?
The last thing you want is for your camera to die in the middle of a meeting. Most camera batteries will get you through the average hour-long meeting, but if you have back-to-back calls scheduled, you’ll need to invest in extra batteries or a way to provide constant power to your camera via an AC adapter.
Don’t underestimate the importance of good auto-focus.
If you’re using a wide aperture to get a shallow depth of field, your face can go in and out of focus with the smallest shifts in movement. Consider choosing a camera that has a continuous face and/or eye-tracking autofocus to ensure you are always in focus.
My Pick:

Price: $999.00
The Canon EOS RP is one of the latest mirrorless offerings from Canon and at around $1,000, it’s one of the cheapest full-frame cameras you can get at that price point. A full frame sensor will give you better low-light performance and shallower depth of field at the same focal length as a camera with a smaller ASP-C or micro four thirds sensor and Canon’s dual pixel autofocus is great for maintaining focus, either through the RP’s fantastic face detect or eye tracking systems. Canon has also recently released a new utility that will allow you to connect their latest cameras as a webcam without the need for an HDMI to USB capture card.

Price: $449.00
At just under $450, the 35mm RF lens is the least expensive of Canon’s newest mirrorless RF mount lenses. And with a 35mm focal length and wide 1.8 aperture, this lens will provide good low-light performance and plenty of background blur. As a bonus, the lens has a minimum focusing distance of 6.7” so you can get right up on it if you’re trying to make a point during a particularly contentious meeting.

Price: $26.99
One of the downsides of the Canon EOS RP is that it takes the smaller LP-E17 batteries, which don’t last very long, especially while using it for video applications. This AC power supply kit replaces the battery and allows you to plug the camera into wall power eliminating the need to constantly change batteries.
Price: $25.95
Again, we’re using the inexpensive desk stand to mount our mirrorless camera for this setup. If you have some additional budget, I’d also suggest adding a ball head to give you even more flexibility positioning the camera.
Total Cost: $1,500.94
So, that’s my advice on a few ways you can up the quality of your video calls depending on your budget. This list is by no means definitive, but hopefully gives you an idea of some things you do to improve your setup. If you have any questions, or would like to offer your hot take on anything listed here, don’t hesitate to shoot me an email at bret@bretneuman.com.